Mastering Inferred Occupancy, Permissive Logic, and Debouncing
My master shower light was a Phantom Nemesis. For months, it was the most frustrating kind of problem: not a spectacular failure, but one that almost worked. I’d built a complex web of humidity sensors and template helpers, a ghost in the machine that, by all logic, should have been reliable. It wasn’t.
My automation kept plunging my wife into darkness. It was a spectacular failure, all because I was trusting my “targeting computer”, a complex web of logic, just like the one Luke Skywalker used in the Death Star trench run. It missed the target every time. This is the story of how I finally switched it off, learned to “use the Force,” and admitted the problem wasn’t my code, but my entire approach.
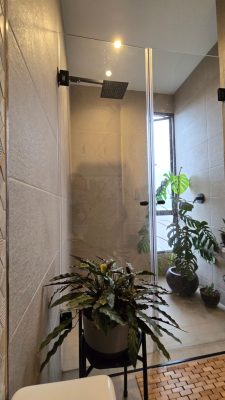
The problem was a combination of modern bathroom design and simple physics. We have a large, glass-enclosed shower, and the main motion sensor near the door couldn’t see through the glass. To make things harder, we almost never close our master bathroom door. That meant I couldn’t use a simple “door is closed” sensor as a reliable trigger. I was flying blind.
The Problem: Trusting the Targeting Computer
My first attempts to solve this were an exercise in creativity and futility.
With a blind motion sensor and an open door, I had to infer occupancy by tracking the “shower environment.” This became my “targeting computer,” a brittle, over-engineered nightmare. At its peak absurdity, it used four helper variables, three custom templates, and two separate temperature and humidity sensors, all just to deduce if someone was in the shower.
My targeting computer had two signature failures. It would either plunge my wife into darkness mid-shower (I blamed her colder, less steamy showers, but I could never fix it) or it would do the opposite, leaving the lights on long after the room was clear. I was chasing a “humidity ghost,” and it was never right. The blackouts were the real killer. They were the final, frustrating proof that my setup was unreliable and just plain dumb.
Using the Force (and a Trap)
My biggest roadblock wasn’t the automation, it was my own stubborn pride. I was sure the complex humidity logic could be fixed. I refused to add a second motion sensor because that felt like admitting failure, and I wasn’t ready to start over. So I kept my sights glued to the targeting computer, refusing to turn it off like a rookie pilot. But every ‘fix’ just added another layer of complexity, making the whole thing harder to understand without actually working. I eventually had to concede defeat and throw it all in the bin.
I finally conceded that no amount of clever software could fix a fundamental hardware blindness. I was trying to infer what a sensor could simply see. The real solution was the one I had stubbornly ignored all along. It was time to “use the Force,” a simple, direct approach: I added a second motion sensor. It’s not waterproof, so I placed it high on the shower arm where it stays dry.

I integrated the new motion sensor by grouping it with the motion sensor near the door into a single binary_sensor group. Suddenly, the ‘wife in the dark’ problem was solved. The automation now had reliable motion data from inside the shower, so the timer would just restart and the light would stay on.
My fix was perfect for me, but it wasn’t portable. I leave the bathroom door open; most people close it. For them, my simple motion sensor group was still a flawed solution. Standing perfectly still in the shower would eventually time out the sensor, and the lights would go off. It solved my problem, but it wouldn’t solve theirs.
This is where I found a clever piece of community logic: “wasp-in-a-box.” It’s a method for inferring occupancy. It works by using the closed door as a “box.” Once motion is detected while the door is closed, the “wasp” (the occupant) is trapped. The automation now assumes the room is occupied and refuses to turn off the light, even if the motion sensor stops. Opening the door is the only way to “release the wasp” and allow the light to turn off.
How It Works
This automation now has two layers of logic: a core “Force” (the sensor) for my main problem, and the “Trap” logic (wasp-in-a-box) for portability.
- The Core Fix (Turning On/Staying On): This is the simple part that solved my core problem. If the door opens or either motion sensor detects movement, the light turns on (if it’s dark enough) and a 3-minute timer (re)starts. Since my motion sensors have a 30-second cooldown, three minutes is a generous window. Any normal movement in the shower will easily re-trigger a motion sensor and restart the timer long before it expires.
- The “Trap” (The Wasp): This is the magic that makes the automation portable. When the motion sensor detects movement while the door is closed, the automation flips an input_boolean helper to true. Just like that, the trap is set.
- The “Off” Logic: When the 3-minute timer finishes, it checks one simple thing: is the “wasp” boolean true or false?
- If false (the door is open), the light turns off as normal.
- If true (the door is closed), the automation does nothing. The light stays on, assuming you’re still in the room, even if you’re standing perfectly still.
- The “Release”: The “release” mechanism is the door itself. Opening it immediately flips the input_boolean helper back to false and, importantly, restarts the 3-minute timer. This provides a grace period to dry off and leave the room. When those three minutes are up, the automation checks the boolean, sees it’s false, and knows it’s finally safe to turn the light off.
Droid Upgrades for the Advanced Features
My targeting computer might be off, but that doesn’t mean the final result isn’t a truly advanced Home Assistant automation. I included three key “droid upgrades” for smart, real-world use.
First, the automation respects the sun. It won’t turn on the light if the room is already bright. Both the door_opened and motion_detected triggers check the lux_sensor before doing anything. The light only activates if the room is dark enough (in my case, under 1000 lux).
Second, it has a manual override to prevent the “haunted house” effect. That’s when you manually turn a light off, only to have the automation turn it right back on. When a human flips the switch, the automation instantly cancels its timer and resets the “wasp” logic. It can tell the difference between you and another script thanks to a clever template: {{ trigger.to_state.context.parent_id == none }}. This code just checks if the switch was changed by a human (no parent_id) or by an automation (which has one).
If you define an exhaust fan in the variables, the automation controls that, too. The logic is simple: it just piggybacks on the door sensor. The fan turns on when the door closes and turns off when it opens.
How to Implement This in Your Home Assistant
This advanced Home Assistant automation is built to be easily shared and adapted. I’ve placed all the key entities into a variables: block to make it easy to customize.
- Copy the Code: You can grab the latest version from my GitHub repository:
https://github.com/TheThinkingHome/Automations/blob/main/light_control_master-shower_occupancy.yaml - Customize Your Entities (Two Places):
- The variables: block: Change the entity IDs here to match your sensors, light, timer, and helper.
- The triggers: block: This is the one small “gotcha.” Home Assistant requires entity IDs in the main triggers: block to be hardcoded. You must also update the entity_ids here to match the ones you set in your variables: block.
- Set Your Fan (Optional): If you do not have an exhaust fan to control, just leave the exhaust_fan: variable set to ‘none’. The automation will safely skip the fan-related logic.
Key Techniques to Use in Your Advanced Home Assistant Automations
Beyond the main story, this solution is a perfect example of how advanced Home Assistant automations are built from a few powerful techniques that are great to keep in your toolkit.
- Variables for Portability: The variables: block at the top is the key to making the automation shareable. By defining our key entities (like light_switch or door_sensor) as variables, we can re-use them throughout the actions: block. This means a new user only has to edit the triggers: and variables: sections, rather than hunting for every entity ID buried in the code.
- A Timer vs. a for: Delay: Many people turn lights off by adding a for: ’00:03:00′ to their “motion off” trigger. The problem is that this timer is dumb. This automation uses a separate timer. entity and sets the automation’s mode: restart. This is a much more robust design. It means any new motion trigger will completely restart the automation, which cancels the old timer and starts a fresh one. This is the secret to ensuring the light always stays on as long as there is activity.
- “Wasp-in-a-Box” for Inferred Occupancy: This is the logic that makes the automation “bullet-proof” for users who close the door. By using a helper input_boolean to “trap” the occupied state when the door is closed, we are no longer reliant on the motion sensor. The motion sensor’s only job is to confirm that someone entered the room, not that they are still in the room. This neatly solves the “standing still in the shower” problem.
- Detecting a Manual Switch Press: That {{ trigger.to_state.context.parent_id == none }} template is one of the most powerful and non-obvious tricks in Home Assistant. It lets the automation know the difference between a human flipping the switch (who has no parent_id) and another automation turning it on (which does). This is what makes the manual override possible and stops the automation from fighting you.
- Permissive Sensor Failure: The lux check includes a small but critical piece of defensive programming: | float(-1). This filter is used in the template {{ states(lux_sensor) | float(-1) < 1000 }}. If the lux_sensor ever fails or becomes unavailable, the template won’t error. It will simply default to -1. Since -1 is less than 1000, the automation permissively allows the light to turn on. This setup correctly assumes that a failed sensor shouldn’t leave you in the dark.
- Optional Entity Handling: The check for the fan, {{ exhaust_fan != ‘none’ }}, is a clean and simple way to make a feature optional. By having the user set the variable to the string none, we can safely wrap all the fan logic in a template condition, and it will be skipped if the feature is not wanted.
- Debounce Logic for Race Conditions: The “Wasp-in-a-Box” has a weakness. What if the motion of closing the door triggers the motion sensor? This race condition could cause the system to “trap” the light on, even when no one is in the room. We solve this by adding a “debounce” check. When the door closes, we check how long the light has been on: {{ (now() – states[light_switch].last_changed).total_seconds() > 5 }}. If the light has been on for less than 5 seconds, we assume it was just transient motion from the door, and we don’t set the trap. This check makes the logic far more resilient to real-world timing quirks.
My wife is no longer being plunged into soapy darkness. The ‘humidity ghost’ is gone, and the ‘Spouse Approval Factor’ has been fully achieved. This automation has been running reliably ever since I finally abandoned my pride and switched off that cursed targeting computer. It just goes to show, sometimes the path to a truly reliable, advanced Home Assistant automation starts by trusting the simple, tangible fix.
If you enjoyed this deep dive into advanced Home Assistant automations and want to explore more Home Assistant projects—from climate control to security integration—check out my full Home Assistant Archive. I regularly post about sensors, scripts, and the automations that keep my home running.